If you have never flown before, or it’s been a long time since your last trip, this step by step guide will walk you through the entire process of air travel. From the moment you leave your home, until the moment you arrive at your destination, this guide will cover it all.
Step 1: Checking in for your flight online
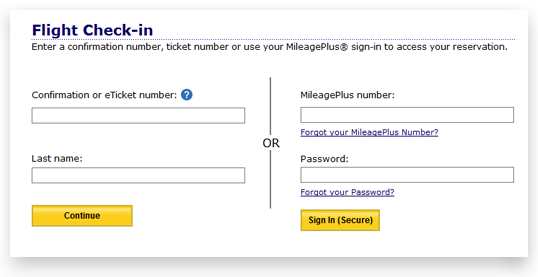
Are your bags all packed and ready for your big trip? If so, you are ready to check-in for your flight online. Most airlines allow you to check-in as early as 24 hours before departure, so make sure to do this as soon as possible. Most airlines these days offer check-in via their website or their mobile apps. If you are not comfortable checking in online, you can always do it at the airport, however, there are some drawbacks to waiting, such as missing out on selecting your ideal seat, having to wait in long lines, and more.
Checking in for your flight is easy. Most airlines just ask for your Last Name, and the confirmation or e-ticket number. You can find these on the reservation that you made for your flight. Once you have entered this information and clicked continue, there will be a few additional steps, such as: Selecting a seat, entering the number of checked bags, confirming your itinerary, and even paying for an upgrade if you would like. Once the online check in portion is completed, your boarding passes will be displayed for you to print and bring to the airport.
Step 2: Arrival at the airport
When you arrive at the airport there is an important question before proceeding to your next step:
Do you have any bags that you need to check in for your flight?
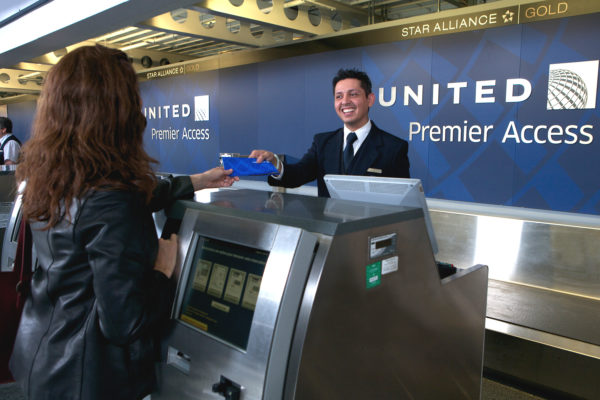
Yes: If you have bags that you need to check in for the flight, then proceed to the airline ticket counter. Here you will need to wait in line, provide photo identification along with your boarding pass you printed at home, and then hand over your bag. The airline will place a tag on the bag that says your final destination, then pass the bag along the conveyor belt to be loaded on to your flight.
Once you have checked your bag in, you are ready to head to the gate!
No: If you do not have a bag to check in for your flight (no bags or just a small carry on bag), then proceed to the next step.
Step 3: Clearing airport security (TSA checks)
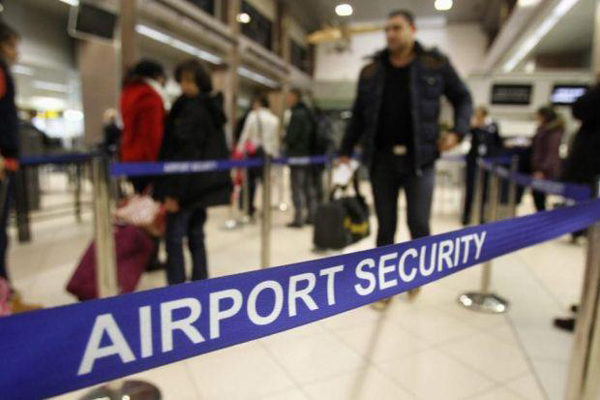
With your ticket and photo identification in hand, you should proceed to the security screening line. Once you have reached the front of the line, the airport security will review your boarding pass and photo identification to ensure that it is you who is traveling, and then wave you through to the x-ray machines for screening. Make sure that you take any laptops/iPads out of your carry on bag, and place them on a separate plastic bin. For travelers in the USA, you will also need to take off your shoes and belts. Travelers outside of the USA do not need to worry about this step and can leave your shoes and belts on.
Once you have cleared security, you are ready for your next step!
Step 4: Finding your gate
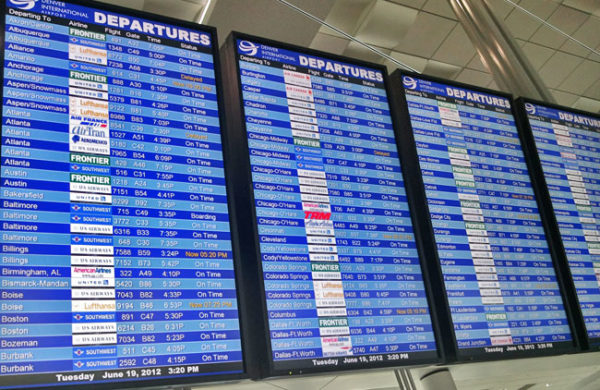
Once inside the airport terminal, look for the “Departures” screen and locate your flight on the board. Make sure to double check the airline name, flight number, and destination. You should always verify what your gate number is, as gates can change and differ from what is printed on your ticket. Once you locate your gate number, proceed to the gate.
Step 5: Boarding your flight
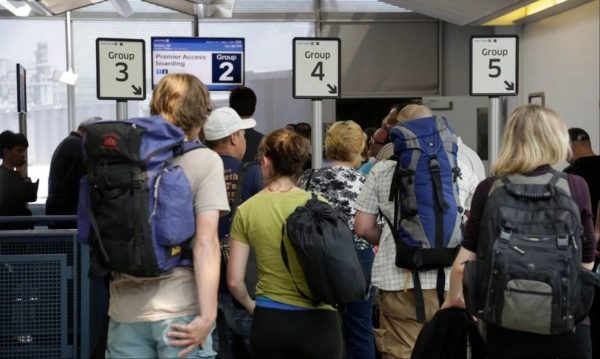
Once it is time to board, the gate agent will make an announcement to notify passengers and begin the boarding process. Some airlines board the plane according to “zones” or “groups”, whereas others just announce a general boarding call. Regardless, the first passengers to board the aircraft are usually First Class / Business Class passengers, preferred members of frequent flyer programs, veterans, parents or disabled passengers who need extra time/assistance, and then the general boarding call.
Step 6: Enjoy the flight!
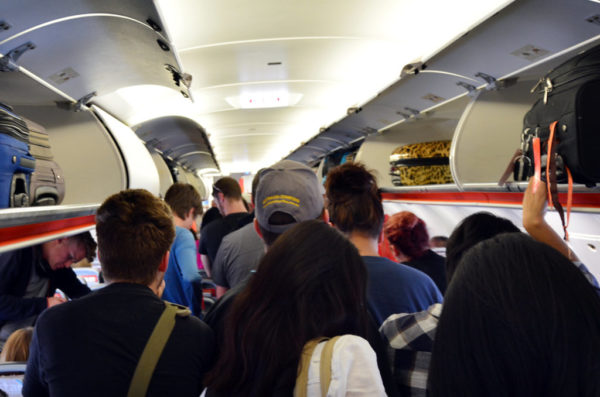
Once you are on board the aircraft, locate your seat (based on the seat number/letter assignment on your ticket). Now sit back and relax. You are about to enjoy all the awesomeness of what air travel has to offer.
Step 7: Arrival
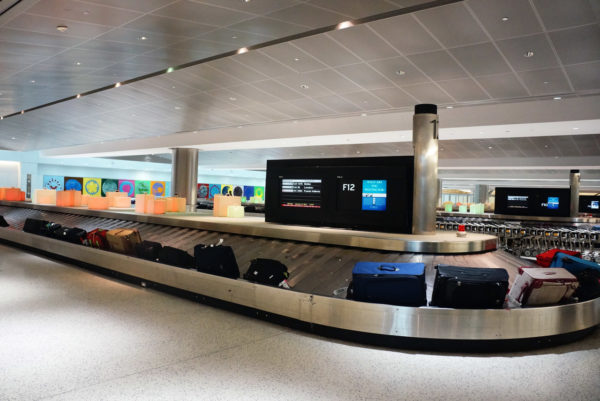
Upon arriving at your destination (assuming it is your final destination and you are not connecting to another flight), you will want to proceed to the “Baggage Claim”, if you checked a bag in for your flight. If you did not check a bag in, then you are free to leave the airport, but if you did check a bag, then locate signs directing you to the baggage claim. Once you are in the baggage claim area (depending on the size of the airport), sometimes you need to reference the monitors to find which baggage carousel your luggage will arrive on. Once you have located the right carousel, simply wait for your bag to arrive. This process can take anywhere from a few minutes up to 1 hour. If on some small chance your luggage hasn’t arrived, and everyone else around is leaving or has left, then you need to proceed to the airline baggage office to report your lost bag.
That pretty much sums up the entire process of traveling by plane from start to finish. We hope you enjoyed this article!